AUTOM8N cluster with Cloudflare Traffic LoadBalancing
You can use CloudFlare Traffic Loadbalancing instead of the built in DNS loadbalncer in AUTOM8N
You will need to enable “Basic Load Balancing” (Allows you to load balance & failover across up to 2 origin servers from 1 geographic region. Cloudflare will automatically check the health of your servers every 60 seconds.) in cloudflare dashboard for this and this will cost 5 USD flat fee plus additional usage based charges at CloudFlare
This guide shows how two domains (you can configure any number of domains,but the origin pool and monitor that will check the upstream health will be common!)
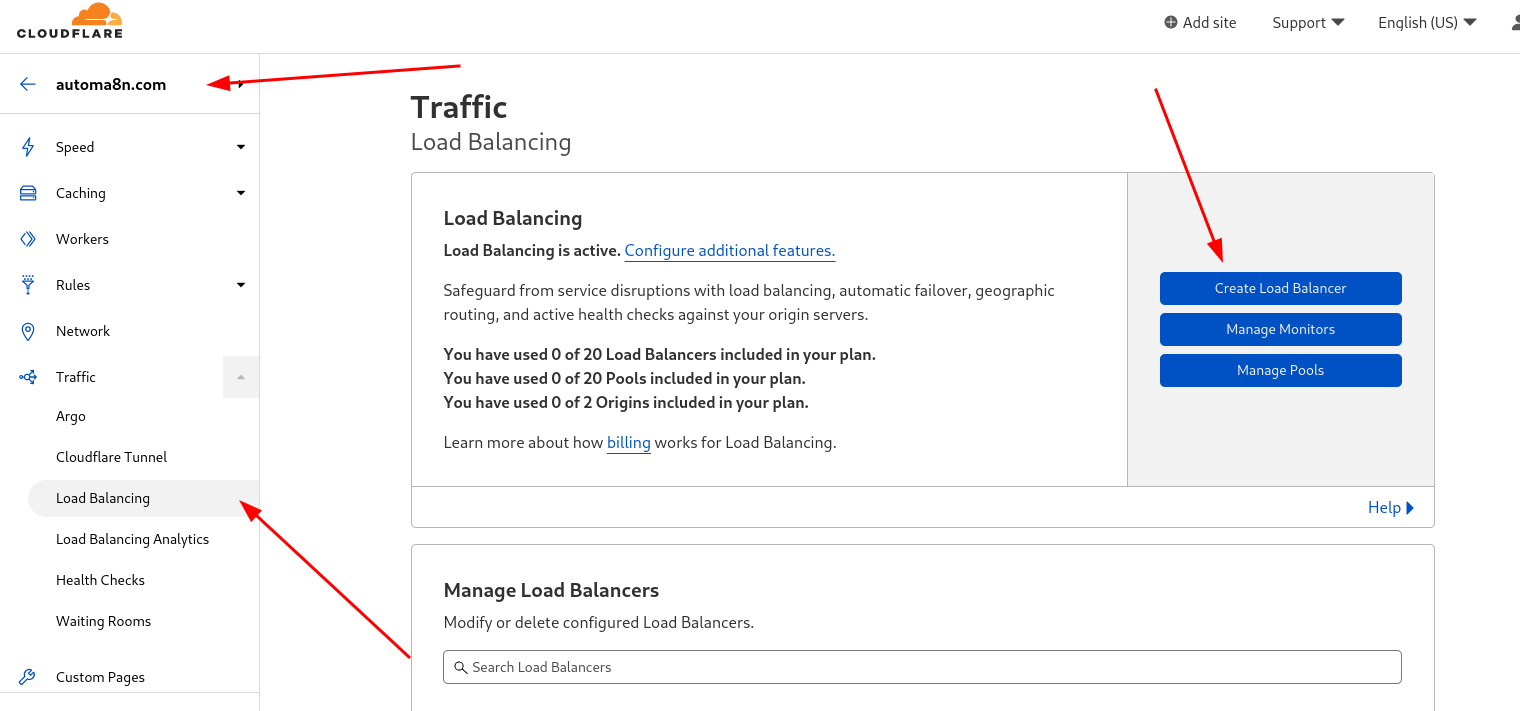
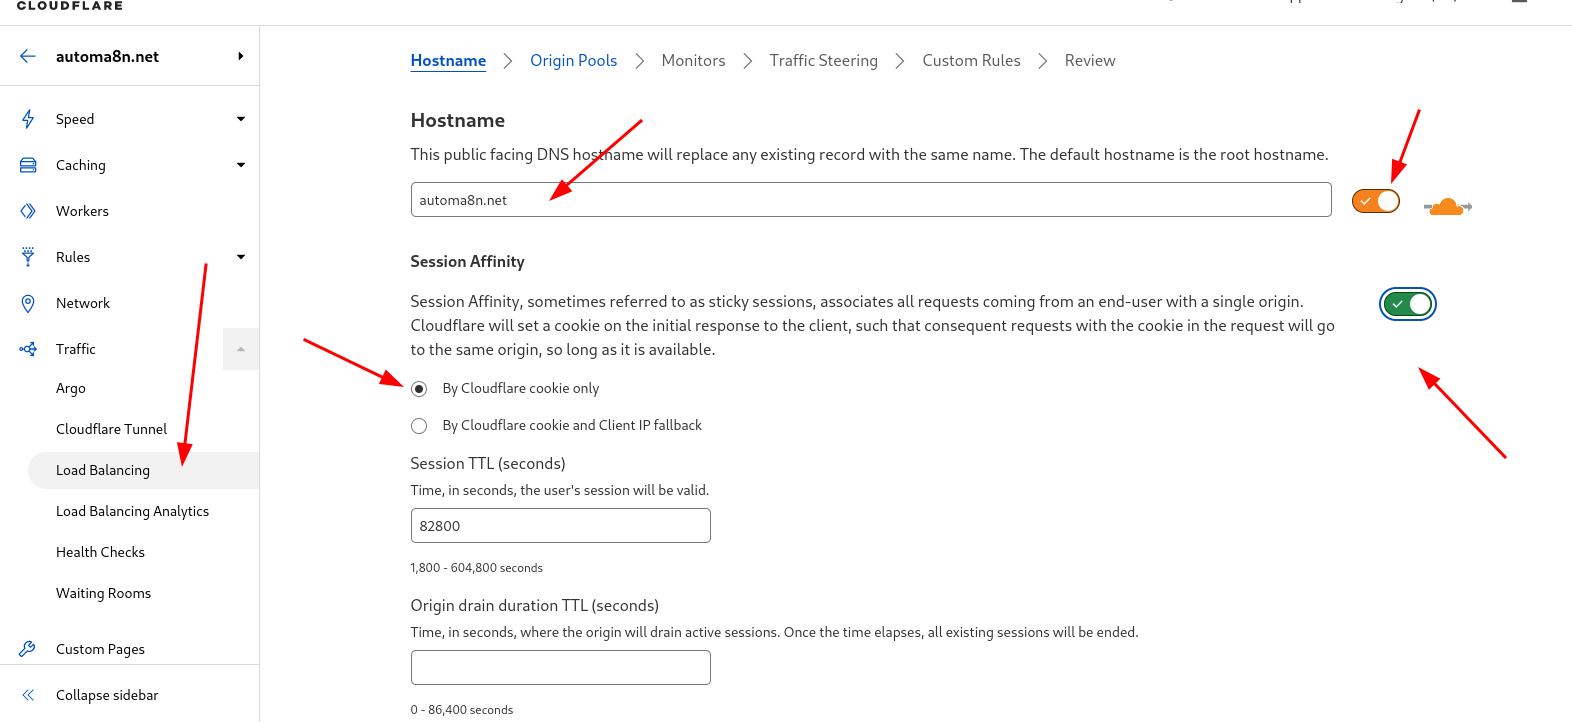
Start creating the loadbalancer config by enabling Traffic Loadbalancer
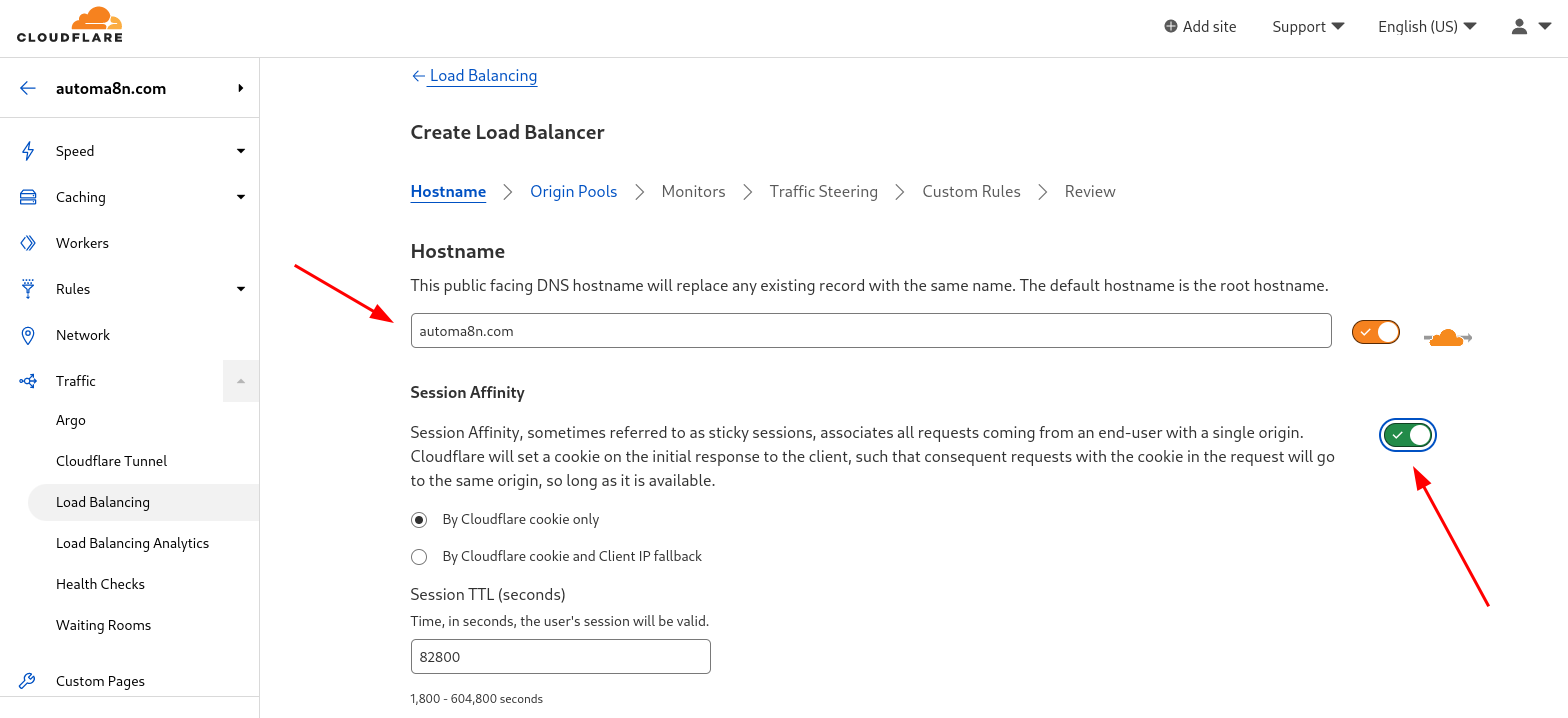
Add the domain name you wish to setup and setup session affinity as required
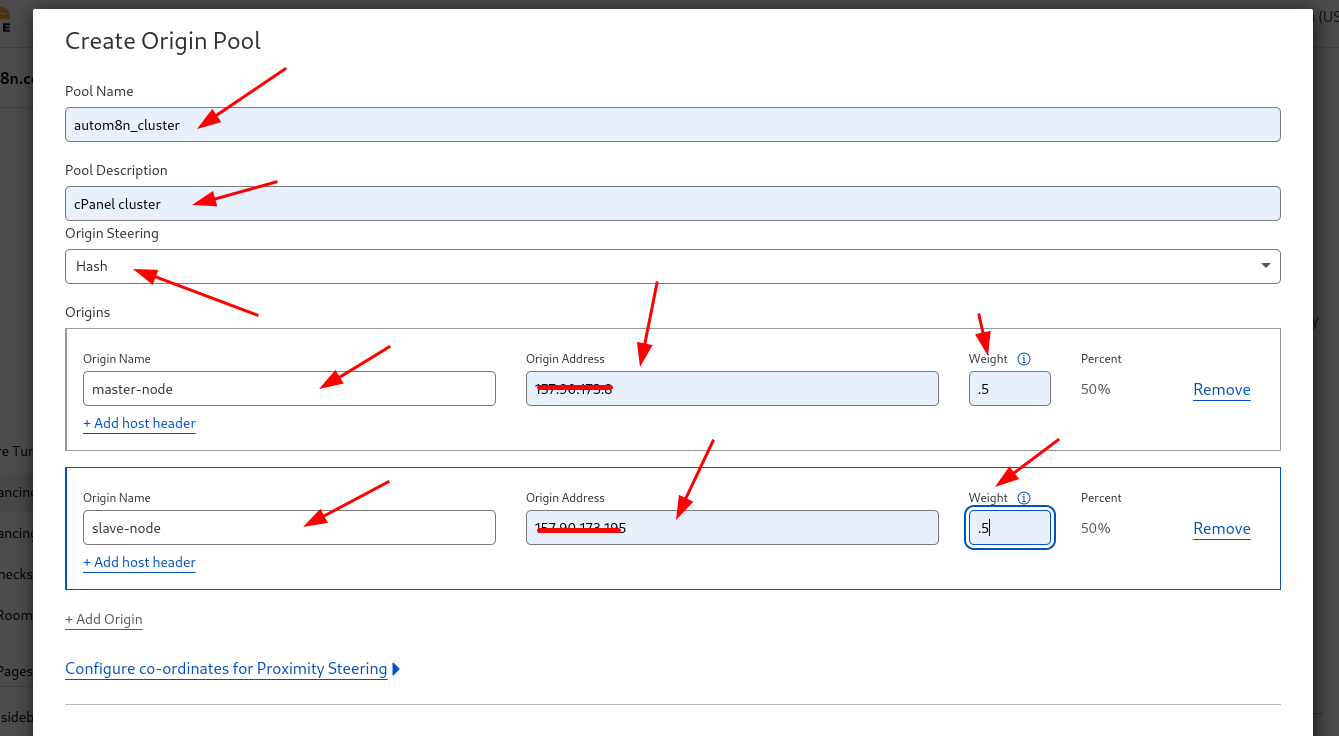
Create an origin pool, this is where you add upstream Autom8n cluster node IP’s

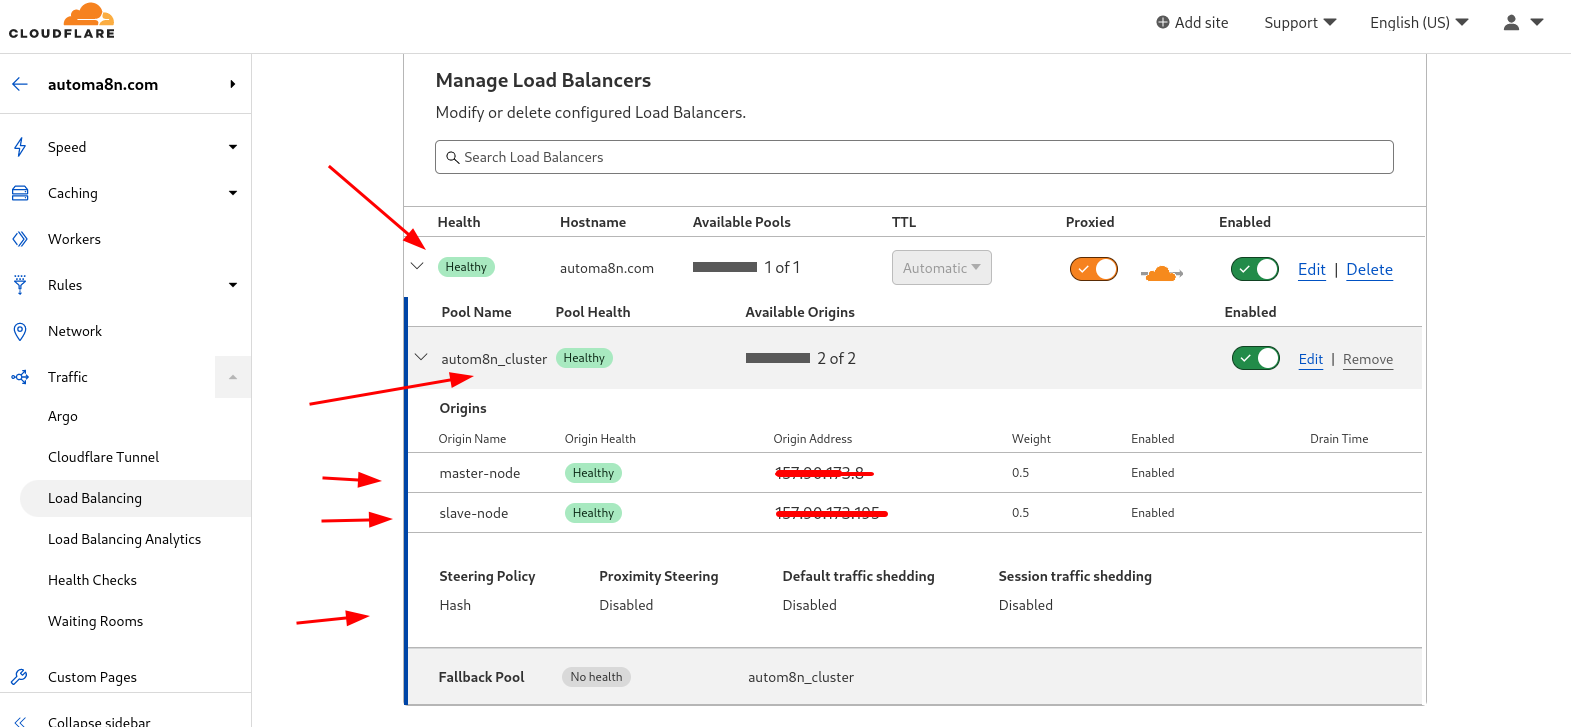
4. Create a named origin pool with the origin address set to master and slave AUTOM8N cluster IP address (note that the pool names and origin names are irrelevant and can be done to make them easily recognizable) The origin weight indicates the amount of traffic each node should handle .Setting them 0.5 each drive equal traffic
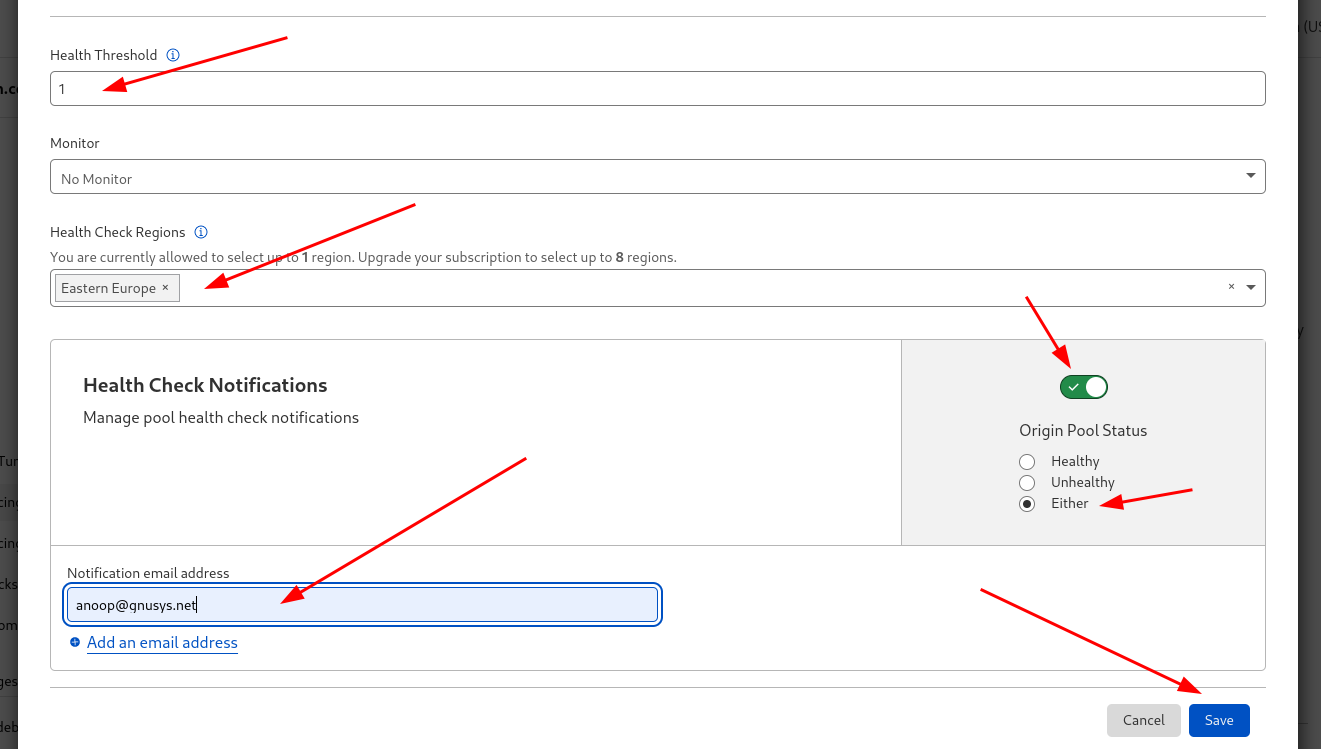
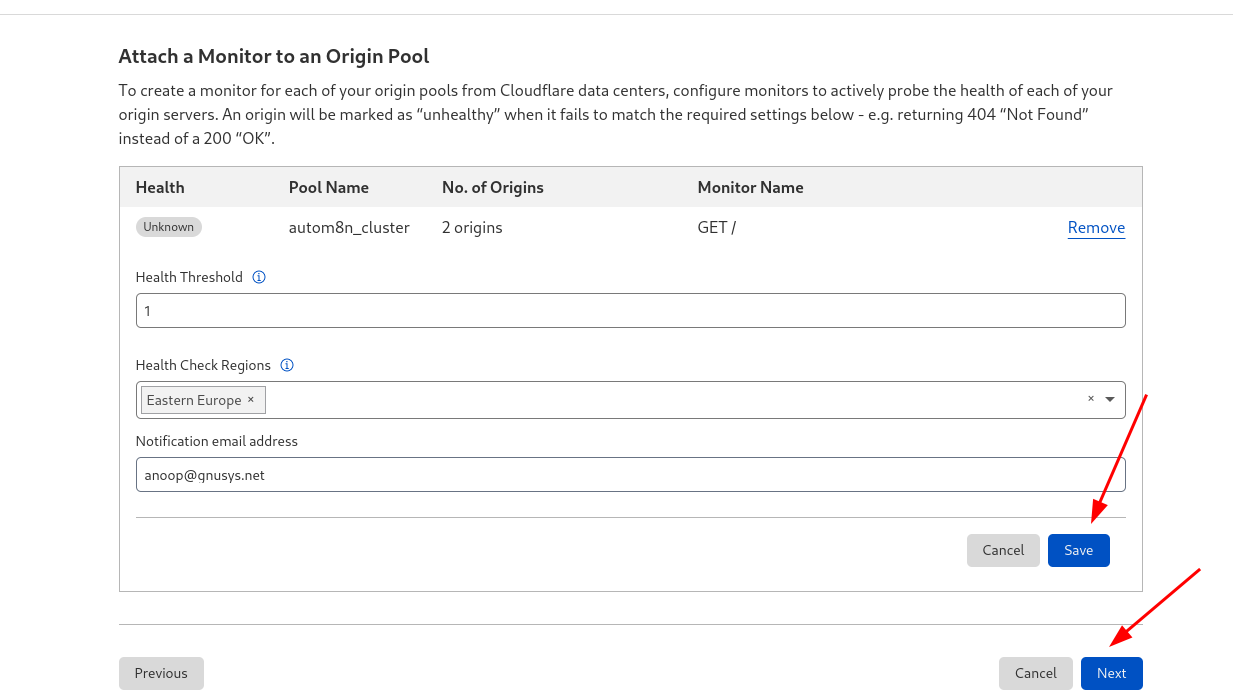
Setup health threshold, your choice of health check region and notification email where you wish to receive alerts
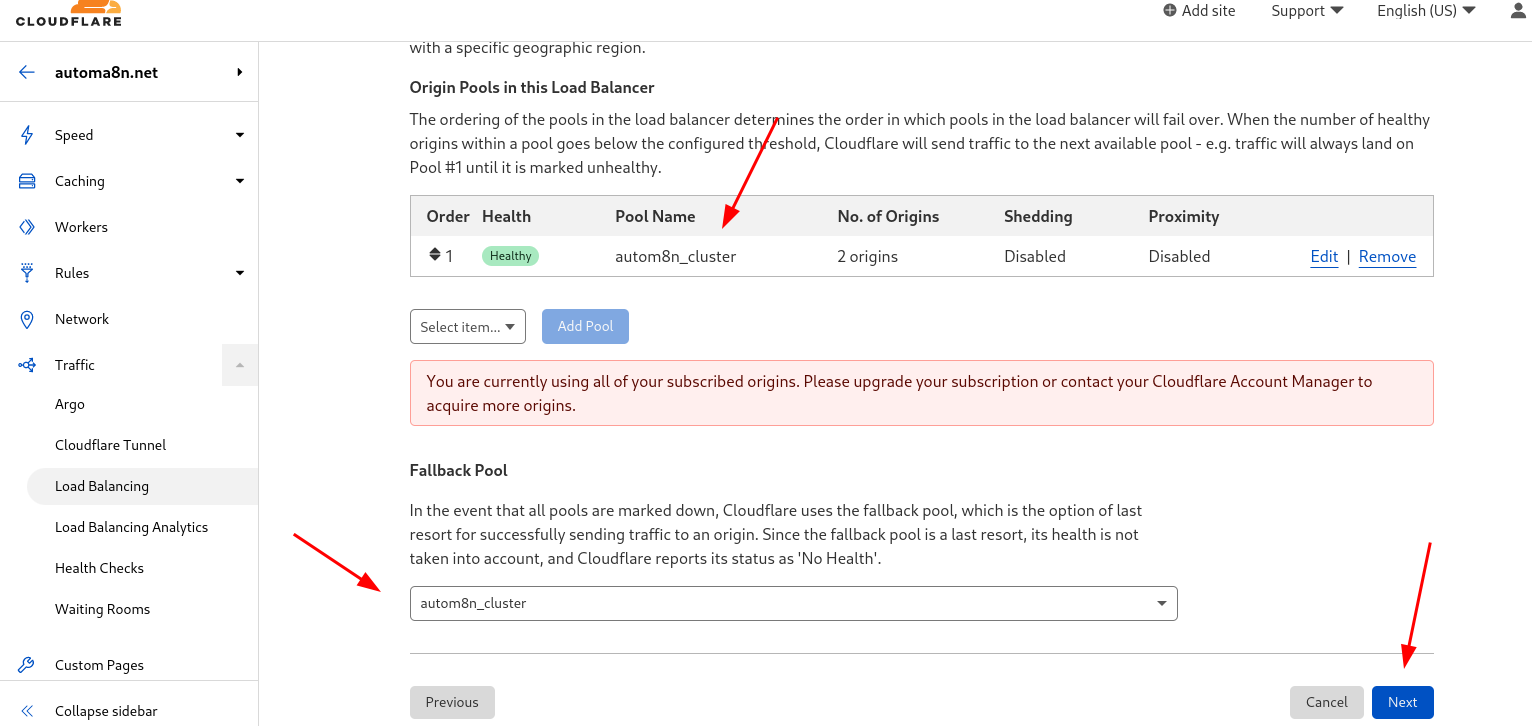
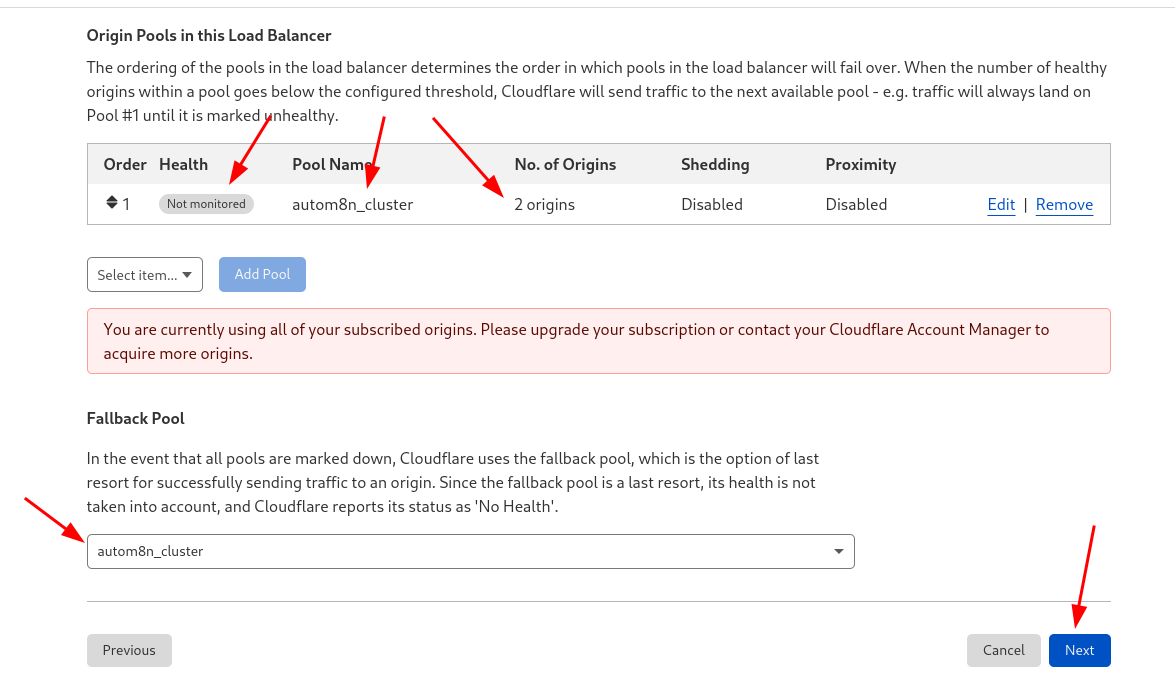
Set the fallback pool same as the origin pool
Attach a monitor to the origin pool
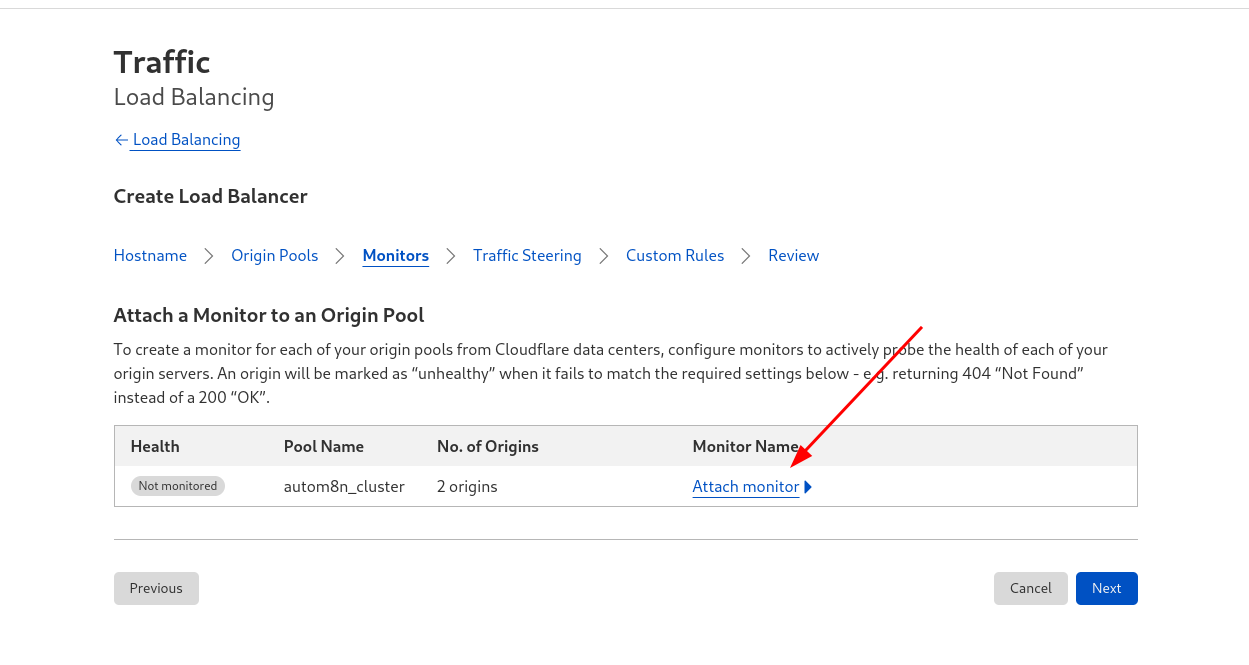
Create monitor and set Host header to the domain name as we will be monitoring this particular vhost
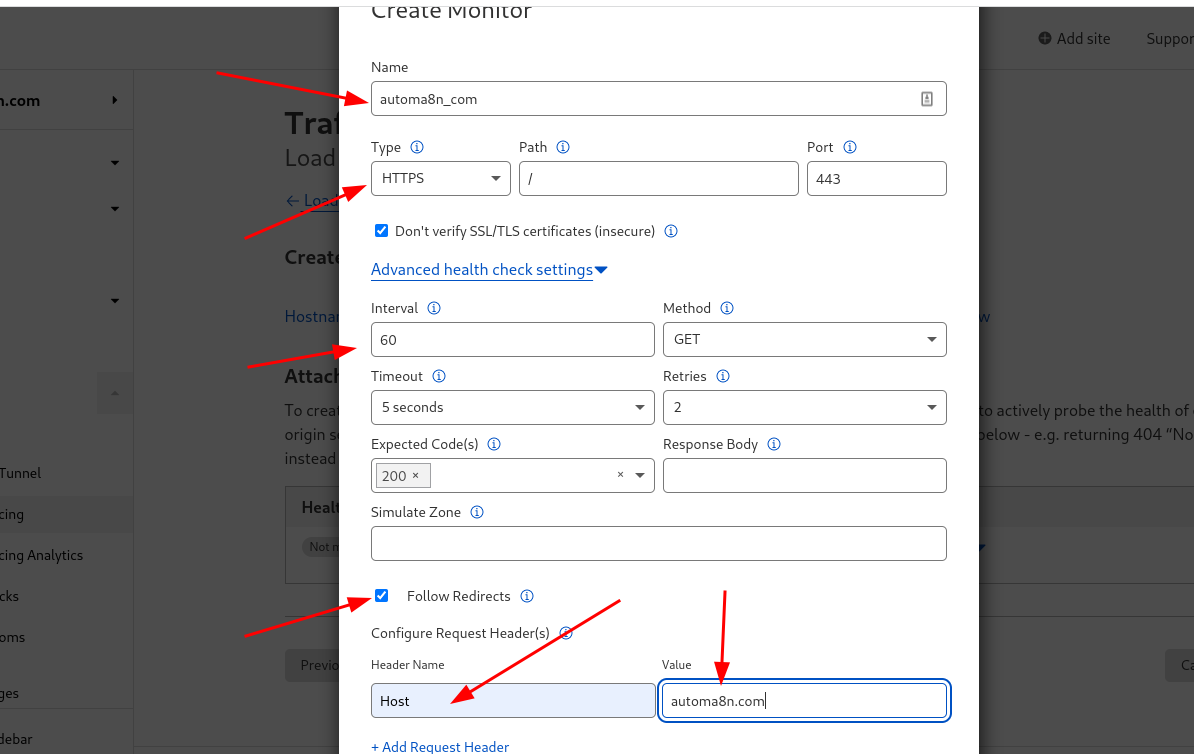
Save the monitor settings
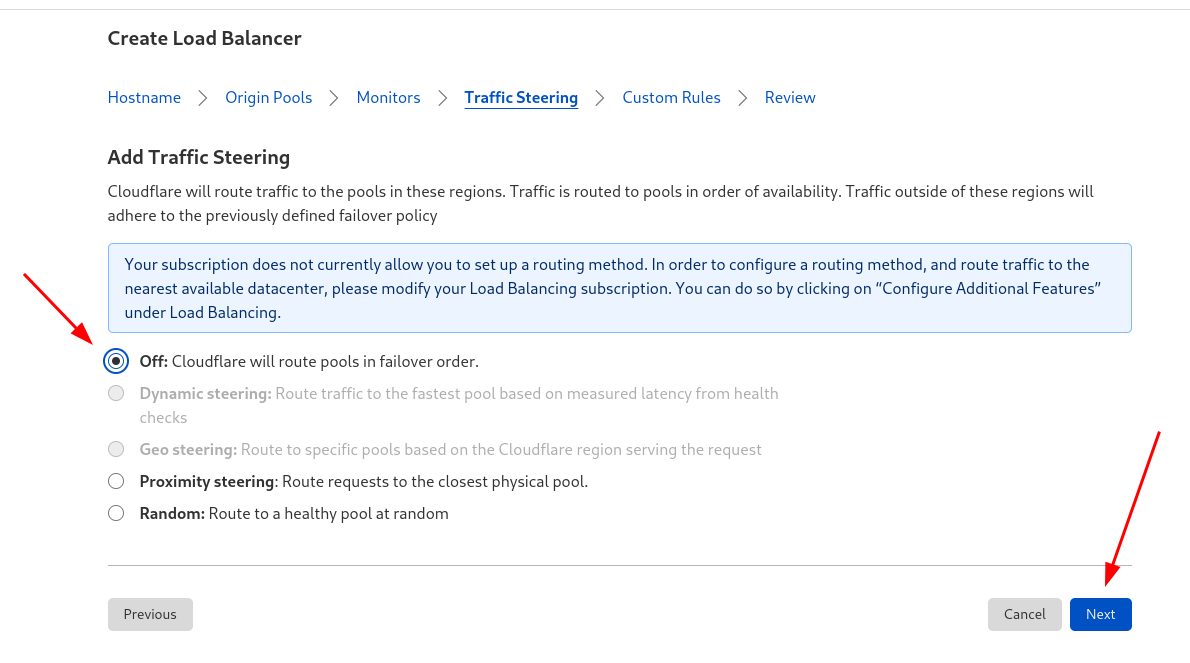
Set the “Add traffic steering ” to Off
Save the loadbalancer setting
The next screen will show the setting summary, ensure they are as needed
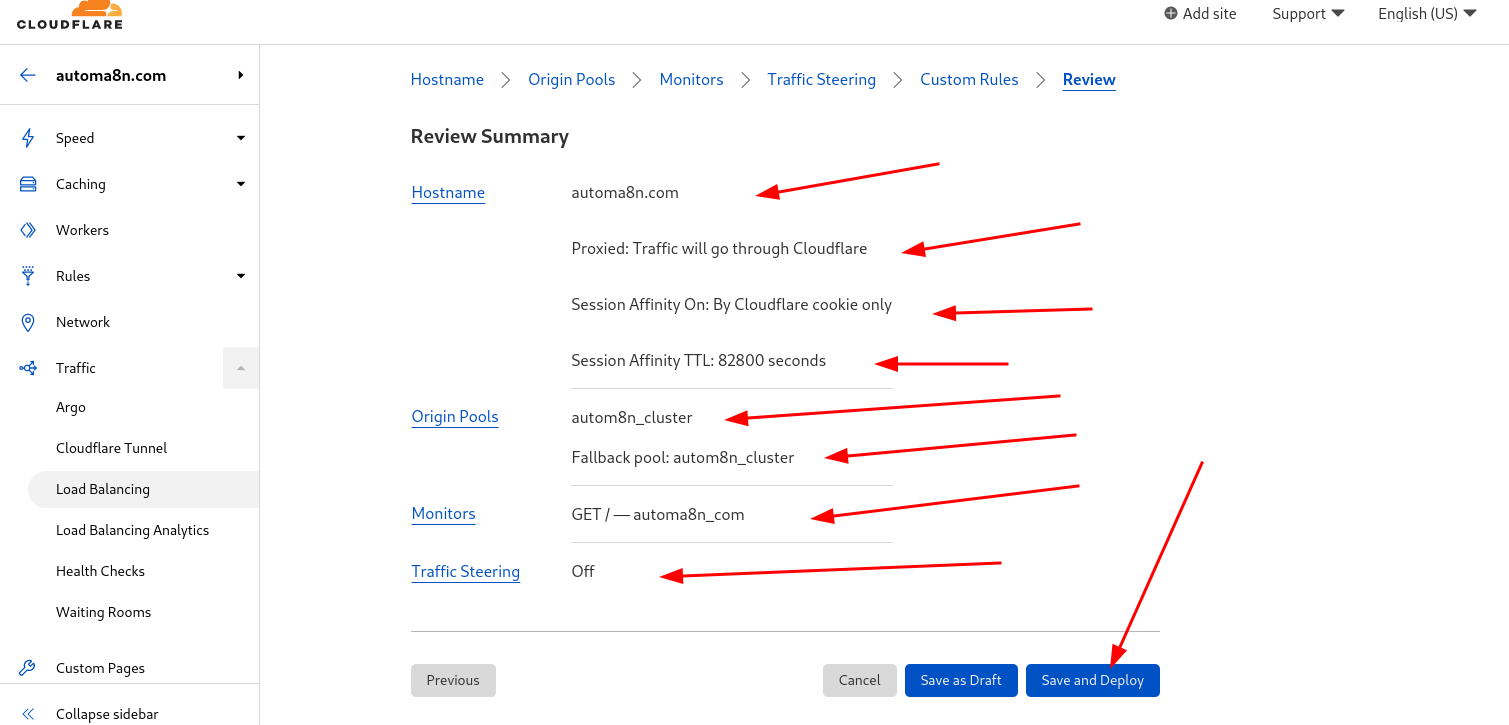
The loadbalancer is now active and will start loadbalancing traffic to upstream AUTOM8N cluster
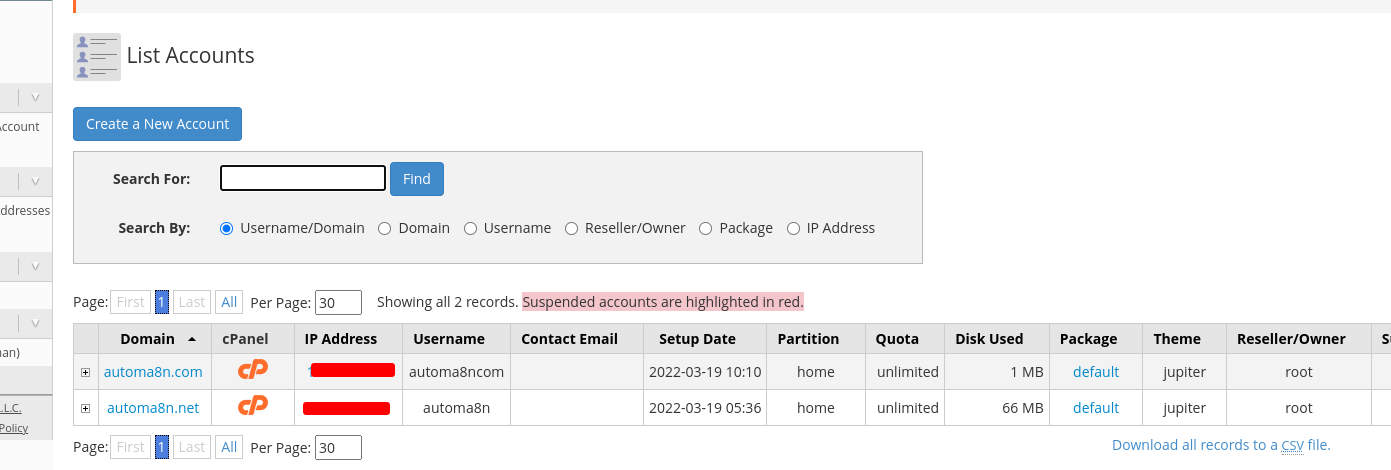
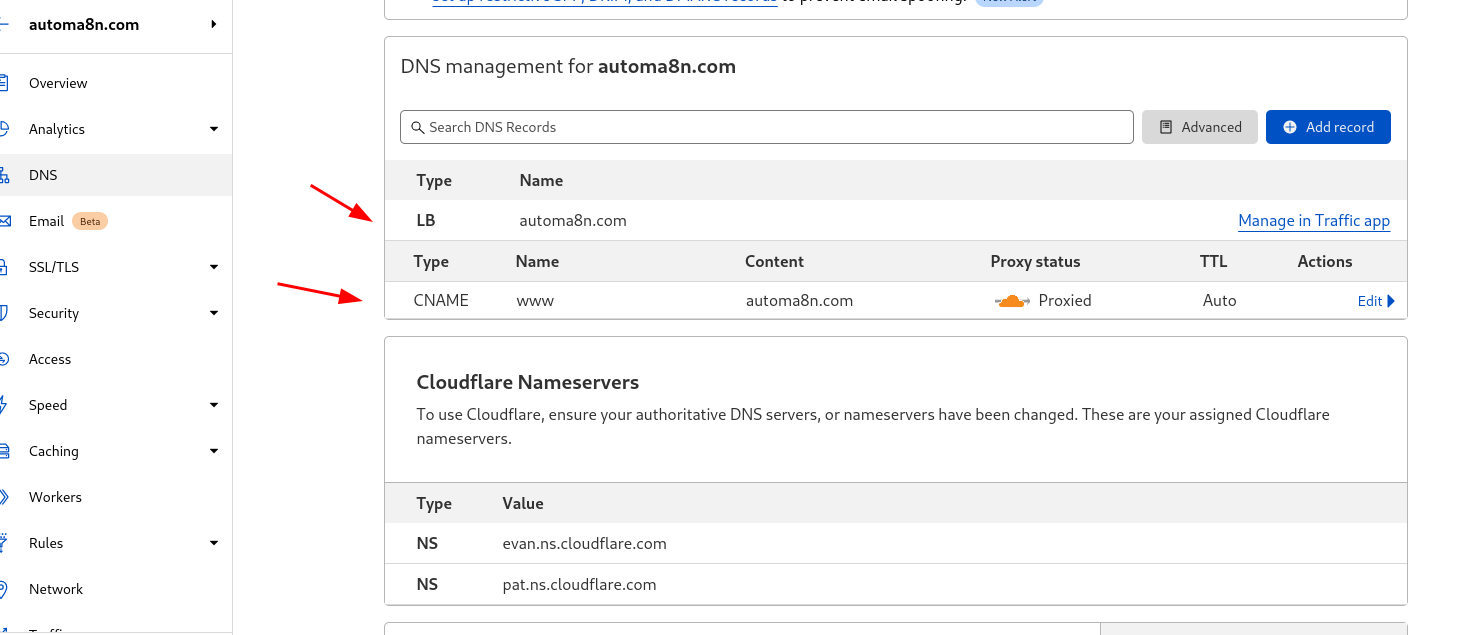
In the DNS setting for the domain, you will see that the DNS resouce is now set to be managed via Traffic app
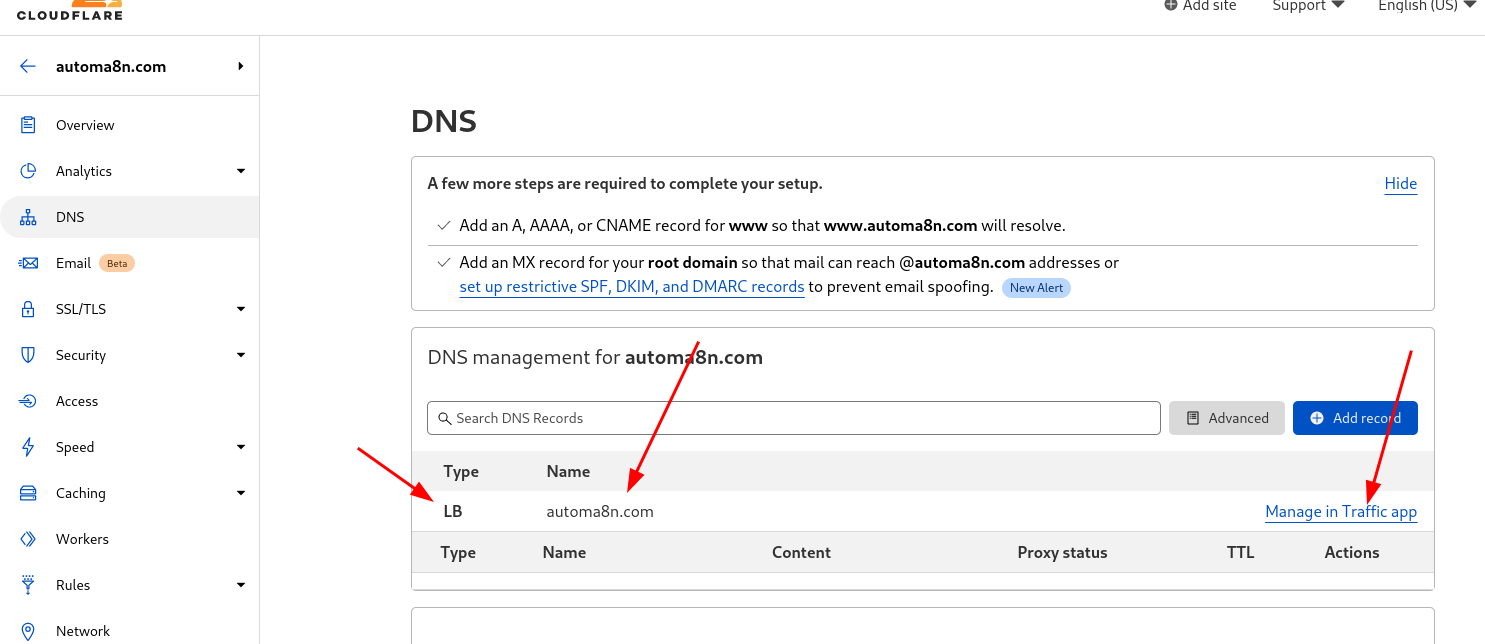
You can add CNAME record for the www DNS resource record to the domain name
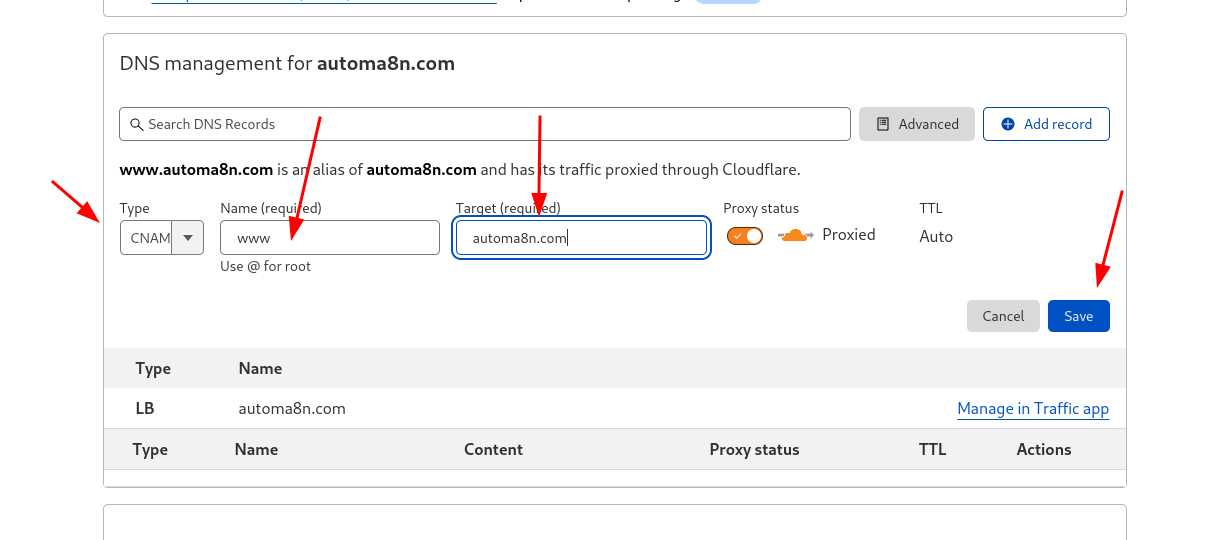
The final DNS management setting will be as below. Note that you can add additional records like MX normally which is not shown here
This completes the setting for one domain and we can continue adding more cpanel domain names configured on the same cluster But these domains will share the same origin pool and same health monitor
Add more domains in the same manner as we added the first
Select the same origin pool we created for first domain